JSX Intro
Dr. Greg Bernstein
Updated September 17th, 2021
Introduction to JSX
Learning Objectives
- Understand JSX as an extension to JavaScript (its not HTML)
- Understand and be able to include expressions in JSX elements
- Use JavaScript to conditionally render JSX
- Use JavaScript arrays and their methods in combination with JSX
What is it?
JSX is a syntax extension to JavaScript
It feels a bit like templates with variable substitution
Instead of adding code to HTML, we add HTML like syntax to JavaScript!
This gives us the full power of JavaScript in creating and modifying web pages
Readings
Simple Example
// Simple JSX expression
const element = <h1>Hello, Website Development from JSX!</h1>;
JSX expressions are compiled into JavaScript
Embedding Expressions
Can put JavaScript expressions inline the JSX with {} syntax, like templates:
// Functions and Embedding\n
function windSpeed() {
      return 25*Math.random();
}

let mySail = 6.6;
let report = <div><p>Sailing on my {mySail}.</p>
              <p>The windspeed is {windSpeed().toFixed(1)}.</p>
              </div>;
JSX → JavaScript Object
After compilation, JSX expressions become regular JavaScript objects.
This means that you can use JSX inside of if statements and for loops, assign it to variables, accept it as arguments, and return it from functions
Combining JSX Expressions
JSX Tags can contain children (branch jsx1):
import React from 'react';
import ReactDOM from 'react-dom';

const intro = <h1>Hello Web Systems!</h1>;
function windSpeed() {
      return 25*Math.random();
}

let mySail = 6.6;
let report = <div><p>Sailing on my {mySail}.</p>
              <p>The windspeed is {windSpeed().toFixed(1)}.</p>
              </div>;

ReactDOM.render(<section>
  {intro}
  {report}
  </section>,
  document.getElementById('root'));
Conditional Rendering
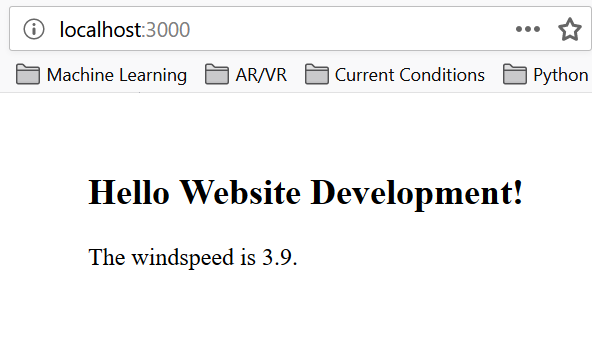
JSX Tags can be changed based on conditions (branch jsx1.1):
import React from 'react';
import ReactDOM from 'react-dom';

function windSpeed() {
      return 25*Math.random();
}

let intro = <h1>Hello Website Development!</h1>;
let wind = windSpeed();
if (wind > 12) {
  intro = <h1>Go Sailing!</h1>
}
let report = <div>
              <p>The windspeed is {wind.toFixed(1)}.</p>
              </div>;

ReactDOM.render(<section>
  {intro}
  {report}
  </section>,
  document.getElementById('root'));
Conditional Rendering Result 1

Conditional Rendering Result 2

Arrays and Loops
Using Arrays of JSX Expressions
- Since a JSX expression gets turned into a JS Object we can put them into JS arrays.
- React will render an array of JSX expressions just like a bunch of HTML elements!
- For efficient rendering we must help React by giving each array element a unique key.
Arrays of JSX Expressions
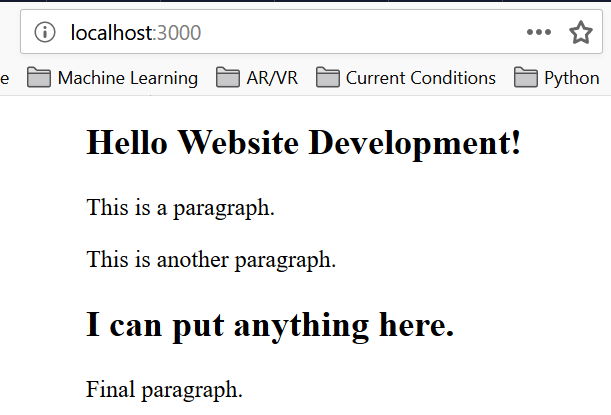
JSX substitutions includes arrays of JSX expressions (branch jsx2):
import React from 'react';
import ReactDOM from 'react-dom';

// Single JSX element
const intro = <h1>Hello Website Development!</h1>;

// Array of JSX elements
let content = [<p key="i1">This is a paragraph.</p>,
  <p key="i2">This is another paragraph.</p>,
  <h2 key="i3">I can put anything here.</h2>,
  <footer key="i4"><p>Final paragraph.</p></footer>]

ReactDOM.render(<section>{intro}{content}</section>,
  document.getElementById('root'));
Rendered array of JSX

Arrays of Objects to HTML elements
One of the most common React patterns is transforming an array of JS Objects to a collection of HTML elements.
- Use JavaScript Array methods!
Array.map()when you want everythingArray.filter()when you want to select only those that match a criteria.
Example: Club Member List
Example Data (students1.json):
[
  {
    "netid": "tc4015",
    "firstName": "Ryan",
    "lastName": "Howell",
    "email": "seersucker1910@outlook.com",
    "password": "R3K[Iy0+"
  },
  {
    "netid": "tb0986",
    "firstName": "Michal",
    "lastName": "Aguirre",
    "email": "agaty2027@yahoo.com",
    "password": "2Gk,Lx7M"
  },
  {
    "netid": "cw3337",
    "firstName": "Deangelo",
    "lastName": "Lane",
    "email": "harpy1986@live.com",
    "password": "lolSIU{/"
  }, ...
]
Create Member Table
The arrays map pattern (branch jsx3):
import React from 'react';
import ReactDOM from 'react-dom';
import members from './students1.json'; // Practice data

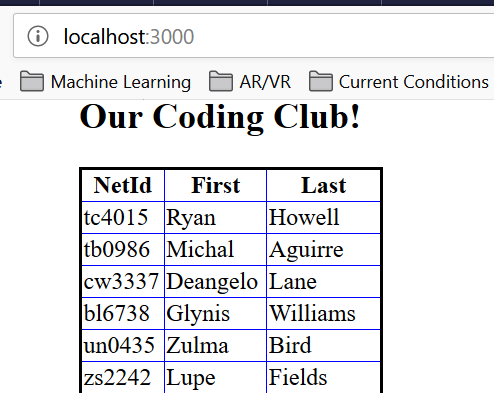
const intro = <h1>Our Coding Club!</h1>;
// Take a look at what we imported
console.log(members);
// Extremely common pattern mapping array of info to array of JSX
let rows = members.map(function(u){
  return <tr key={u.netid}><td>{u.netid}</td><td>{u.firstName}</td><td>{u.lastName}</td></tr>;
});

let memberTable = <table className="myTable">
  <thead><tr><th>NetId</th><th>First</th><th>Last</th></tr></thead>
  <tbody>{rows}</tbody>
</table>;

ReactDOM.render(<section>{intro}{memberTable}</section>,
  document.getElementById('root'));
Member Table Rendered

Attributes in JSX
Specifying Attributes with JSX
Either string literal:
const element = <div tabIndex="0"></div>;or Curly braces:
const element = <img src={user.avatarUrl}></img>;But not both! React will take care of quotes in the curly brace case.
JSX Attribute Names
From Intro JSX
Since JSX is closer to JavaScript than HTML, React DOM uses camelCase property naming convention instead of HTML attribute names.
For example,
classbecomesclassNamein JSX, andtabindexbecomestabIndex.
CSS in JSX
- The CSS
styleattribute can be given a JavaScript object with styling information - The syntax of the “styling” objects obeys the attribute naming rules above.
- Property values are given as text and keep their names.
let liStyle = {display: "flex", justifyContent: "space-between",
  fontFamily: "sans-serif"};
Example Arrays and Styling
(branch jsx4:
import React from 'react';
import ReactDOM from 'react-dom';
import chemElements from './elements.json'; // Practice data

function randInt(max){
  return Math.floor(Math.random()* Math.floor(max));
}
let num = randInt(100);
let range = 10;
const intro = <h2>Element with Atomic number {num} through {num + range}</h2>;

// Filter only the elements we want
let filtered = chemElements.filter(function(u){
  if (u.atomic_number >= num && u.atomic_number <= num + range )
    return true;
  else
    return false;
});
// CSS styles to be applied to elements
let liStyle = {display: "flex", justifyContent: "space-between",
  fontFamily: "sans-serif"};
let numStyle = {backgroundColor: "yellow", color: "blue", width: "10em"};
let nameStyle = {backgroundColor: "gray", color: "white", width: "10em"};
// Map pattern
let listItems = filtered.map(function(u){
  return <li key={u.symbol} style={liStyle}>
    <span style={numStyle}>Number: {u.atomic_number}, </span>
    <span style={nameStyle}>Name: {u.name}, </span>
    <span style={numStyle}>Symbol: {u.symbol},</span>
    <span style={nameStyle}>Atomic weight: {u.atomic_weight}</span></li>;
});

let elementList = <ul>
  {listItems}
</ul>;

ReactDOM.render(<section>{intro}{elementList}</section>,
  document.getElementById('root'));
Rendering

Other JSX Info
JSX Prevents Injection Attacks
It is safe to embed user input in JSX:
const title = response.potentiallyMaliciousInput;
// This is safe:
const element = <h1>{title}</h1>;
How’s this really work? 1
- Babel.js compiles JSX down to
React.createElement()calls.
This
const element = (
  <h1 className="greeting">
    Hello, world!
  </h1>
);
How’s this really work? 2
Becomes:
const element = React.createElement(
  'h1',
  {className: 'greeting'},
  'Hello, world!'
);