General Instructions
In this homework: CSS Positioning, CSS FlexBox, CSSGrid, Node NPM, Modules, Parcel, React
Create and Use a new Branch hw5
We will create a new git branch called hw5 (starting from your ‘hw4’ branch) for use in this assignment. The branch you create must exactly match the one I’ve given you for you to receive any credit for this homework.
Prior to creating this new branch make sure your working directory is “clean”, i.e., consistent with the last commit you did when you turned in homework 4. Follow the procedures in [GitHub for Classroom Use]((https://www.grotto-networking.com/WebsiteDevelopment/files/lectures/Git/GitClass.html) to create the new branch, i.e., git checkout -b hw5. Review the section on submission for using push with a new branch.
Use README.md for Answers
You will modify the README.md file to contain the answers to this homework.
# Homework #5 Solution
**Your name**
**NetID: yourNetID**
Question 1. (10 pts) Fixed Positioning (Menu at top), Modal Dialog
Important: This feature must work on your deployed web site to receive full credit.
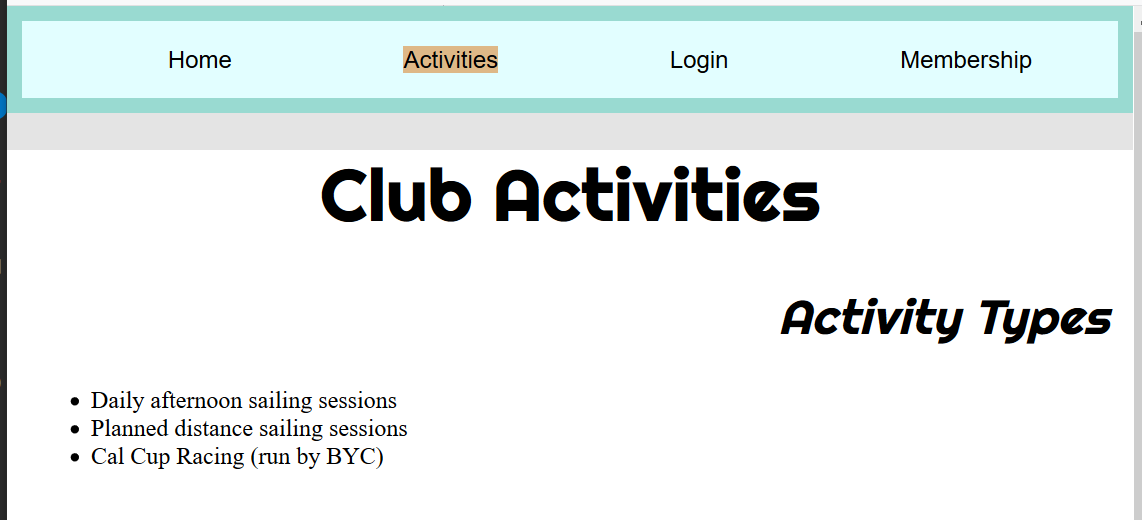
(a) Convert to Horizontal Menu
Without changing the HTML on your site convert from the vertical menu of the previous homework. Into a horizontal menu as shown in the screenshot below:
Hint: there are two approaches you can use. One is based on using flexbox the other based on inline-block.
(b) Keep Site Menu at Top of Window
Now lets keep the menu in the same place no matter how much the user scrolls. Make sure that all your page content is still visible. Hints: Use the appropriate positioning, and margin on the appropriate elements.
Show the HTML code for your <nav> (menu) here.
Show the CSS code used for the menu and related elements here.
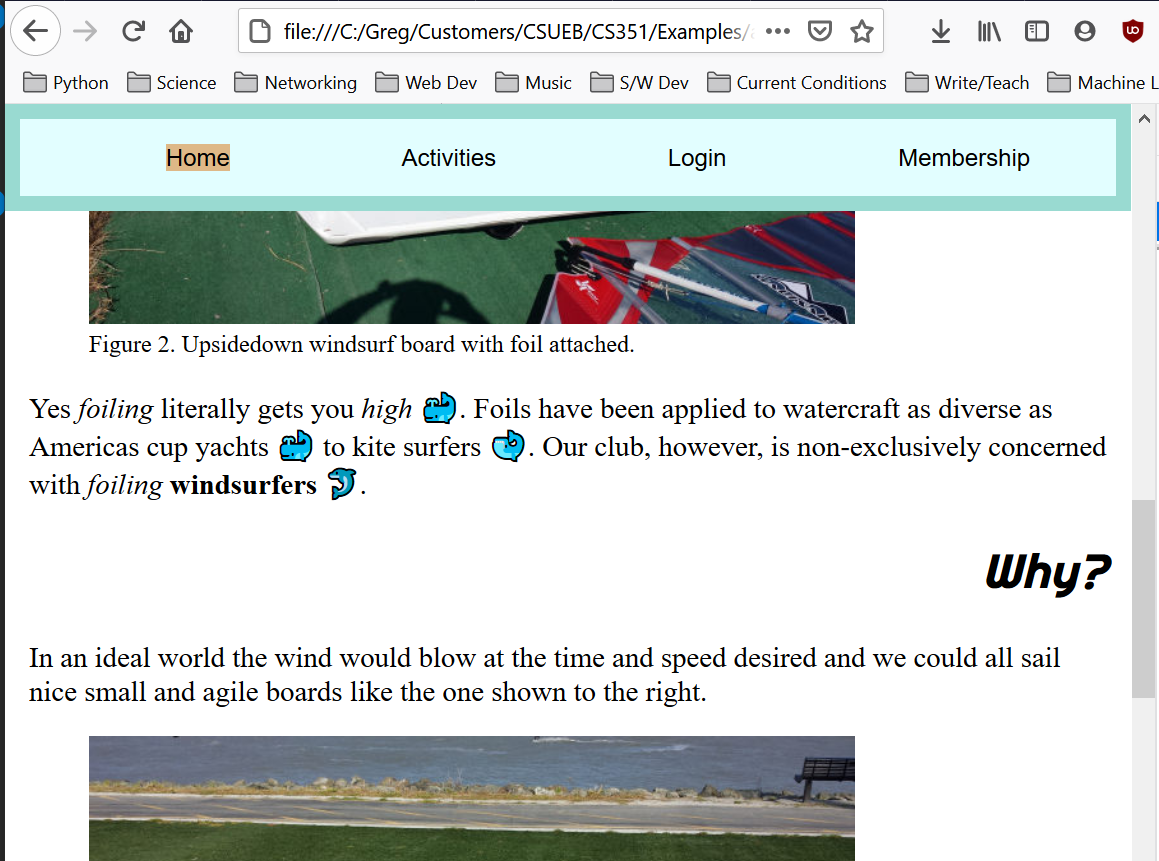
A screenshot of my home page scrolled down a bit looks like:
Question 2. (10 pts) Flexbox, Grid, and Deployment
Important: This feature must work on your deployed web site to receive full credit.
(a) Flex for Centering
Text that looks good on a tablet or a cellphone may be difficult to read on a laptop screen because it may be too wide. To consistently place a given number of characters on a line of text which CSS unit(s) might you use? (write your answer here)
Use the appropriate CSS property to limit the width of your <main> (or other element containing text). Then use CSS flexbox to center this element horizontally on the page. Show your CSS code here.
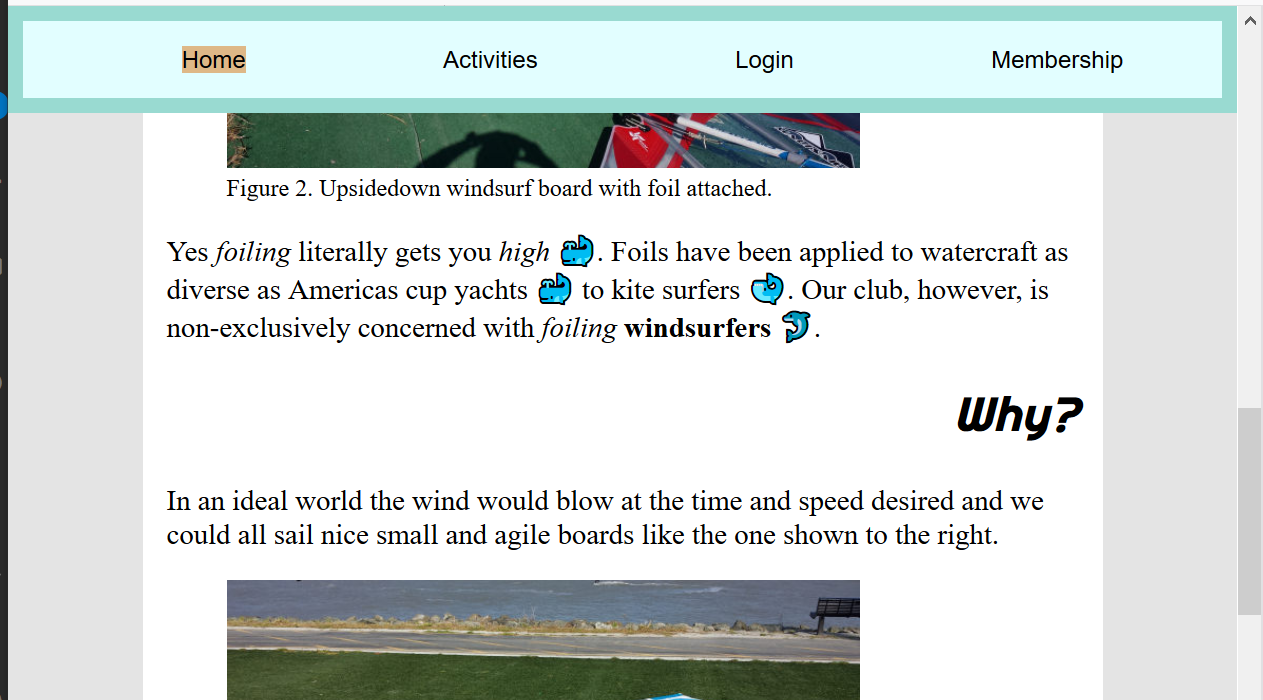
A screenshot of my home page after these modifications looks like:
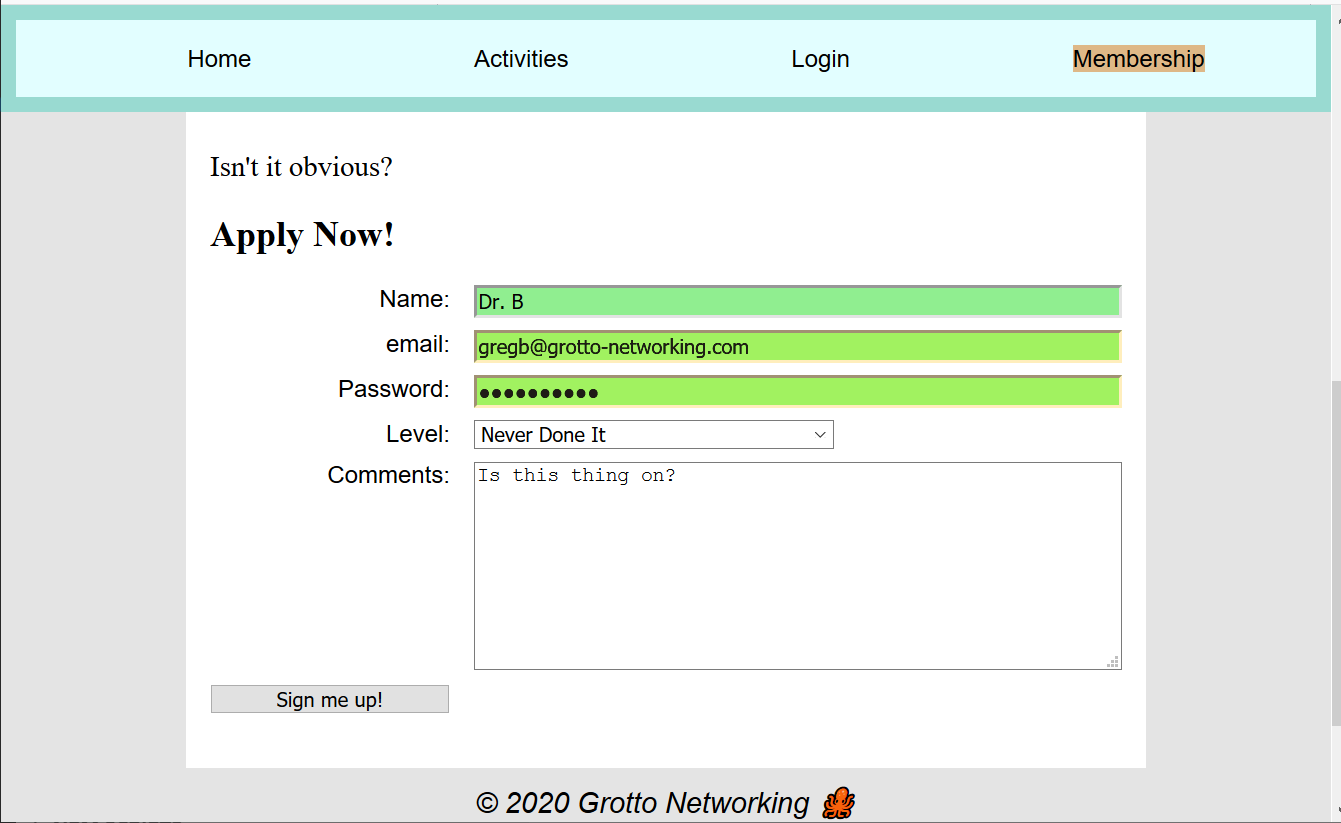
(b) Grid for Membership Application controls
Now clean up your club membership application form using CSS grid. Show the HTML for the various inputs and button along with their containing element here.
Show the CSS you used here.
Your “application form” should look as nice (or better) than my screenshot below:
(c) Deployment
Deploy your updated web site and put a link to that site here.
Question 3. (10 pts) Node and NPM (installation), file read
Hints: all the great JavaScript MDN: String, MDN: Array, Object, and more methods and functionality is available for use in Node.js. The HTML DOM and browser APIs are not! You will need to use a command console whose current working directory is your Practice directory to run the programs you write in this problem.
(a) Installation and Practice directory
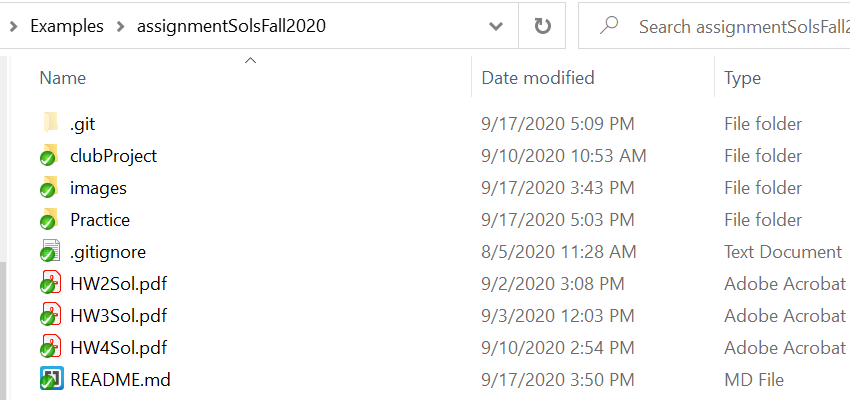
Install node.js. Report the version number here. At the top level of your repo create a directory named Practice to hold your work for this and the next problem.
A screenshot of my repo directory structure looks like:
(b) Simple File Read
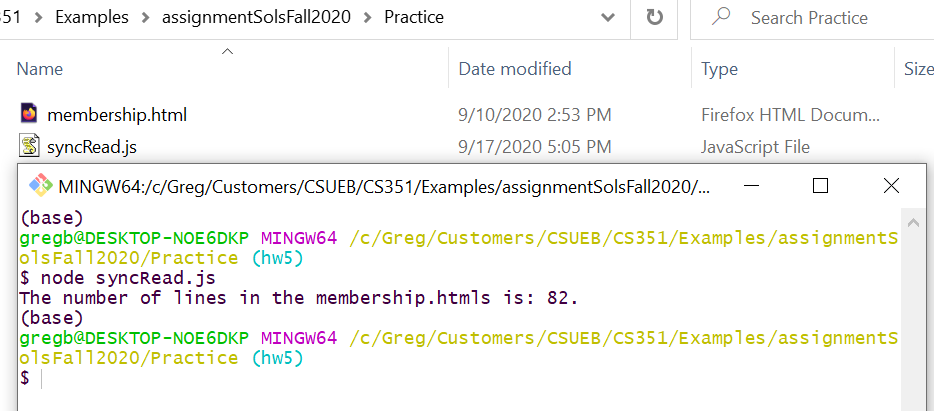
Copy one of your club project HTML files into this directory (a copy, not a move). Write a Node.js program to read this file and print out the number of lines in the file. Note: see the course slides on Node/NPM for how to do this with ES6 modules. This should be easy.
Show your program (JavaScript) here. Along with a screen shot of your command line running the program and showing its output.
My screenshot looks like.
(c) Event Data in JSON
Which format is more restrictive: JSON or JavaScript? (Answer here)
Convert your JavaScript event data from the previous homework into a JSON file and put it in your “Practice” directory. You can check that you have proper JSON with an online JSON validator. Show your JSON here.
(d) JSON data import, console log
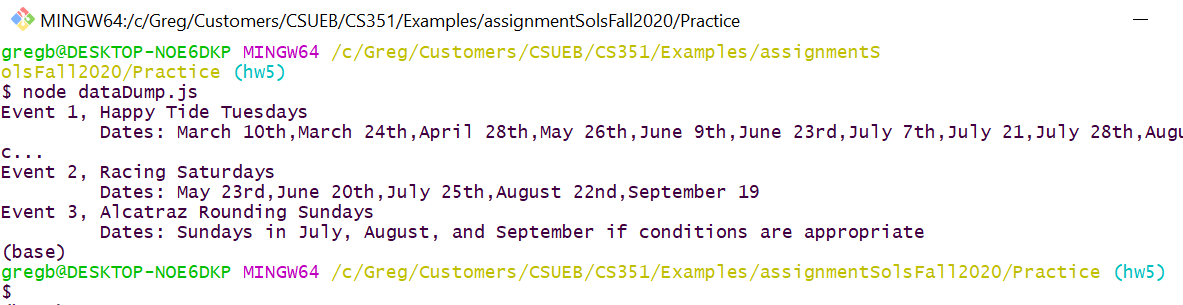
Write another Node.js program that “imports” your data file (into a JavaScript array). Have this program print out the data from this file nicely without using any “for”, “do”, or “while” loops. Show your code here and show a screenshot of your console. Note: see the Node/NPM course slides for how to read and process a JSON file, don’t worry about understanding how this part of the code works for now.
My screenshot looks like:
Question 4. (10 pts) Parcel and React Installation, Hello React
Hints: You will need to use a command console whose current working directory is your Practice directory. You will use this for installation and running your the Parcel.js bundler.
(a) Create package.json
Within your Practice directory create a package.json file by one of the methods recommended in in the course slides. Be sure to commit this file to Git. Write the approach that you used to create the package.json file here.
(b) Install Parcel and React
We will be using the Parcel.js V2 bundler for development and building our React apps. We will install this using NPM. See the above link on getting started. We will first use this in our Practice directory so you can use the following command to install it (or any method that you like, e.g. yarn)
npm install --save-dev parcelWithin your Practice directory do an install of React with the command:
npm install --save react react-domShow the contents of your package.json here (not the package-lock.json).
(c) Create a basic HTML file
Starting with the file below as your base index.html file in your practice directory. Update the <title> element with your name rather than mine.
<!DOCTYPE html>
<html lang="en">
<head>
    <meta charset="utf-8" />
    <!-- <link rel="stylesheet" href="index.css" /> -->
    <meta name="viewport" content="width=device-width, initial-scale=1, shrink-to-fit=no" />
    <title>Dr B's First React App</title>
</head>
<body>
    <div id="root"></div>
    <script src="index.js"></script>
</body>
</html>
(d) Write your first React App
In your Practice directory create an index.js file based on the following, modify it to use your name and not mine.
// index.js file
import React from "react";
import ReactDOM from "react-dom";
let myName = "Dr. B"; // Use your name not mine!!!
let contents = <section>
<h1>Hello from React</h1>
<h2>{myName}</h2>
</section>;
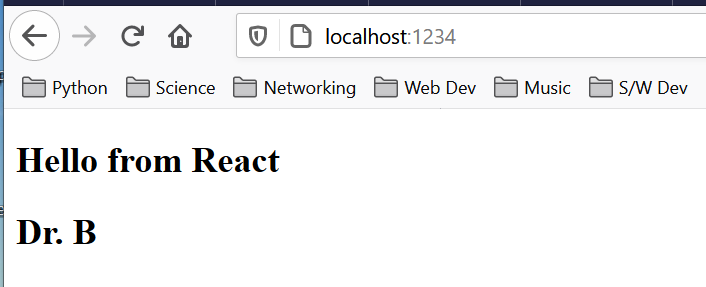
ReactDOM.render(contents, document.getElementById("root"));(e) Run Parcel.js in development mode
Now its time to debug your application. To run Parcel.js in development mode for our project use the command:
node_modules/.bin/parcel index.htmlDebug your app. Sometimes you need to restart Parcel after you fix major bugs that stop the “bundling”. Take a screenshot of your command line. Mine looks like:

Open your browser to the link given in the console and take a screenshot of your React app. Mine looks like:
Question 5. (10 pts) JSON import, Table Render from Data
(a) Import JSON data and check it
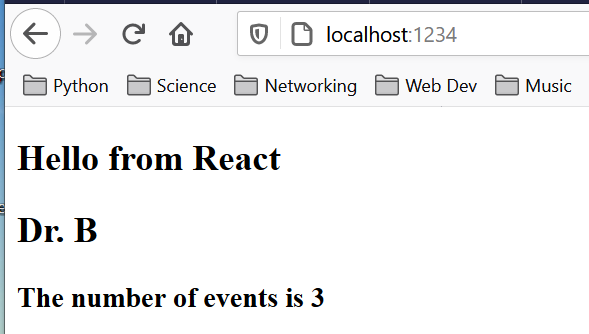
We are now going to use a “bundler” feature that is not standard JavaScript but is very commonly used. We are going to import a JSON data file and check its content.
Below is my modified index.js file to do this.
import React from "react";
import ReactDOM from "react-dom";
import events from "./eventData.json" // Importing JSON!

let myName = "Dr. B";
// Use some of the events information below
let contents = <section>
    <h1>Hello from React</h1>
    <h2>{myName}</h2>
    <h3>The number of events is {events.length}</h3>
  </section>;

ReactDOM.render(contents, document.getElementById("root"));
Modify your index.js to import your event data and show a screenshot of the result. Mine looks like:
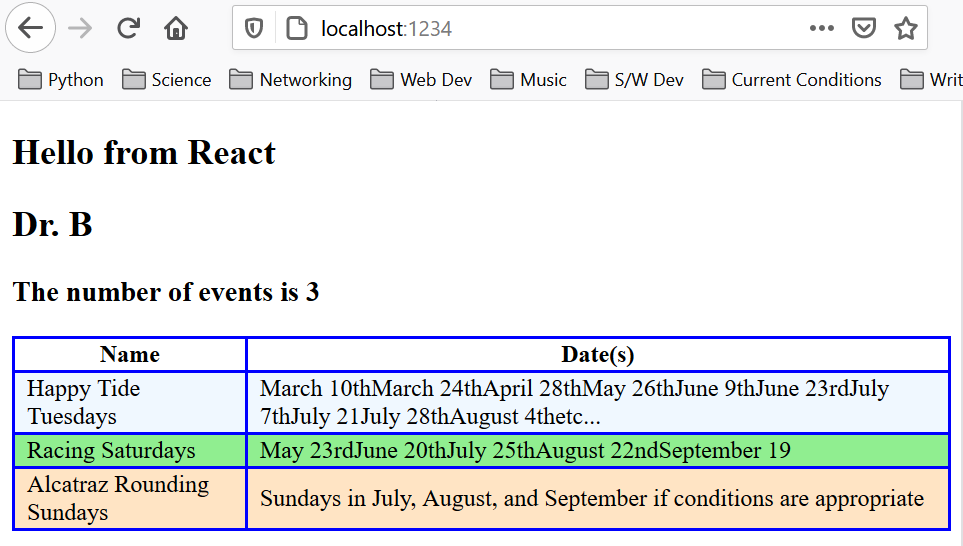
(b) Build a table from your data
Now lets see how React and JSX will allow us to create HTML from data in a way similar to what we did “by hand” in the previous homework. I modified my index.js once again to look like:
import React from "react";
import ReactDOM from "react-dom";
import events from "./eventData.json" // Importing JSON!

let myName = "Dr. B";

// Create table rows with array map method
let tableRows = events.map(function(event){
    return <tr><td>{event.name}</td>
                  <td>{event.dates}</td></tr>;
})
// Create a table using rows from above
let myTable = <table>
    <thead>
        <tr><th>Name</th><th>Date(s)</th></tr>
                </thead>
                <tbody id="ActTable">
                {tableRows}
                </tbody>
    </table>;

// Create contents using table from above
let contents = <section>
    <h1>Hello from React</h1>
    <h2>{myName}</h2>
    <h3>The number of events is {events.length}</h3>
    {myTable}
  </section>;

ReactDOM.render(contents, document.getElementById("root"));
Modify your index.js in a manner similar to what I did to display your club’s activities data as a table. Do not worry about understanding all the React stuff yet! We will cover it soon. Show a screenshot here. Mine looks like (styling not required):