General Instructions
Topics this week: React Function components and start with Class Components and React development tools.
Create and Use a new Branch hw6
We will create a new git branch called hw6 for use in this assignment. The branch you create must exactly match the one I’ve given you for you to receive any credit for this homework.
Prior to creating this new branch make sure your working directory is “clean”, i.e., consistent with the last commit you did when you turned in homework 5. Follow the procedures in GitHub for Classroom Use to create the new branch, i.e., git checkout -b hw6. Review the section on submission for using push with a new branch.
Use README.md for Answers
You will modify the README.md file to contain the answers to this homework.
# Homework #6 Solution
**Your name**
**NetID: yourNetID**
Questions
We are going to start converting club web site into a React based App. Do all your work for this in a new top level directory named clubReact. Create a package.json file in this directory (using any of the methods from the course slides) and install via NPM the react, react-dom, and parcel packages.
Question 1 (10 pts) React App HTML structure and CSS
(a) Starter React with CSS
In your new clubReact directory create a basic index.html and index.js for use with Parcel and React such as in the course notes or use these from homework #5. In addition bring over your CSS styles from your clubProject and link to them as from your index.html file in the standard HTML way.
Hints: There are a number of issues to be fixed as we take the raw HTML from our website project and bring it in as JSX. One is that all HTML class attributes that you may have been using for styling need to be changed to className attributes in JSX.
In addition images need to be brought in via a two step process. First import you images and then use that imported item for the src attribute, e.g.,
import neptune from "./images/PIA01492.jpg";
// Use in JSX
let nepImage = <img src={neptune}  />;
(b) Menu Component
Now lets create a “non-functional” menu component based on the <nav> you used in your club website. Note: we are now building an app starting from those web pages. Create a separate file to hold your new React function component for the menu. This function should return a <nav> JSX element.
Your initial index.js will import the menu component and will look something like this:
import React from "react";
import ReactDOM from "react-dom";
import events from "./eventData.json"
import Menu from "./menu"; // my new menu component in menu.js

// Create contents using imported Menu
let contents = <Menu />;

ReactDOM.render(contents, document.getElementById("root"));
Give the filename of your new menu component here. Show a screenshot of your app here.
My screenshot looks like:
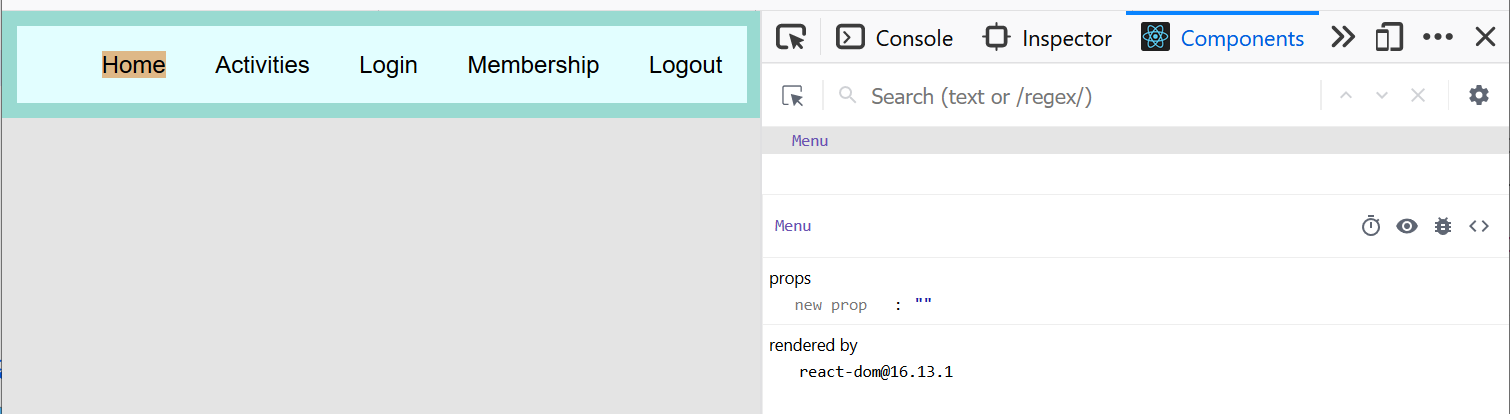
Note: the menu does not work at this point in development.
(c) Home Component
Now create a new file holding a home React functional component based on you club websites home page. Import and show this component along with your menu component.
My index.js showing both the menu and the home components looks like:
import React from "react";
import ReactDOM from "react-dom";
import events from "./eventData.json" // Importing JSON!
import Menu from "./menu"; // my new menu component
import Home from "./home";
// Create contents using imported Me(nu and Home page
// This is a [React Fragment](https://reactjs.org/docs/fragments.html#short-syntax)
// that avoids creating extra <div>s.
let contents = <><Menu /> <Home /></>;
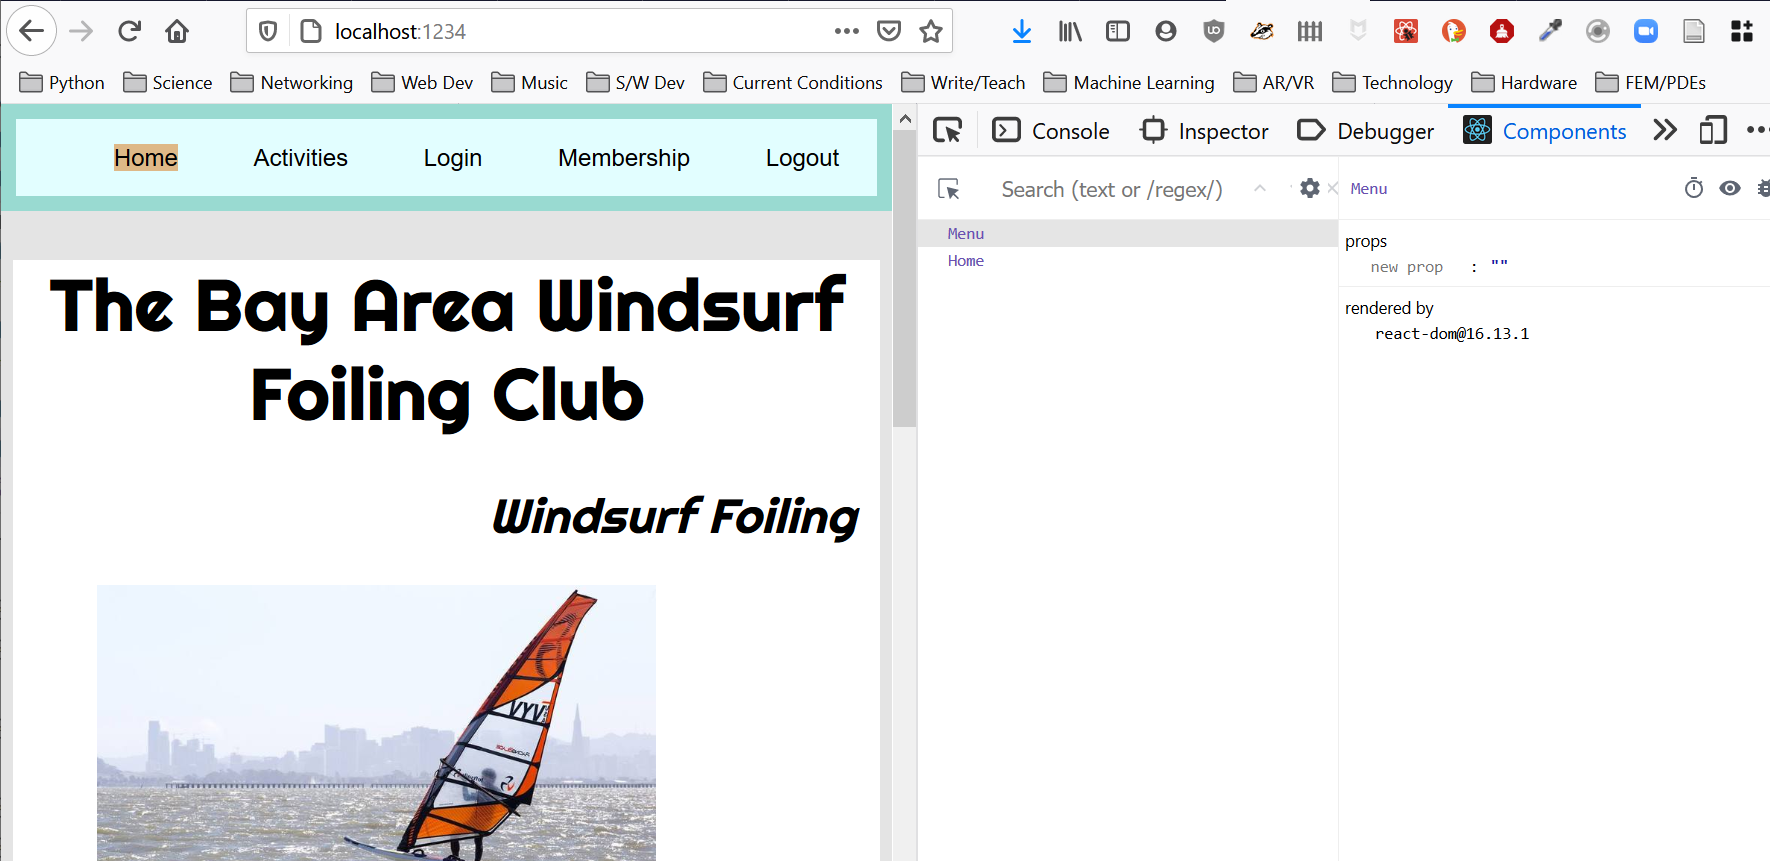
ReactDOM.render(contents, document.getElementById("root"));Give the filename of your new home component here. Show a screenshot of your app here with both menu and home component showing.
My screenshot looks like:
Question 2 (15 pts) Activities, Login, and Membership Components
Since we will be working with React through the rest of the course you should now install the “React Dev Tools Extension” in one or more of your development browsers.
These will allow you to look at React components, manipulate state, etc…
(a) Activities Component
Create an activities component that receives an array of activities and displays them in a table. Part of my index.js file that uses this component now looks like:
import events from "./eventData.json" // Importing JSON!
import Menu from "./menu"; // my new menu component
import Home from "./home";
import Activities from "./activities";
let contents = <><Menu /> <Activities events={events} /></>;
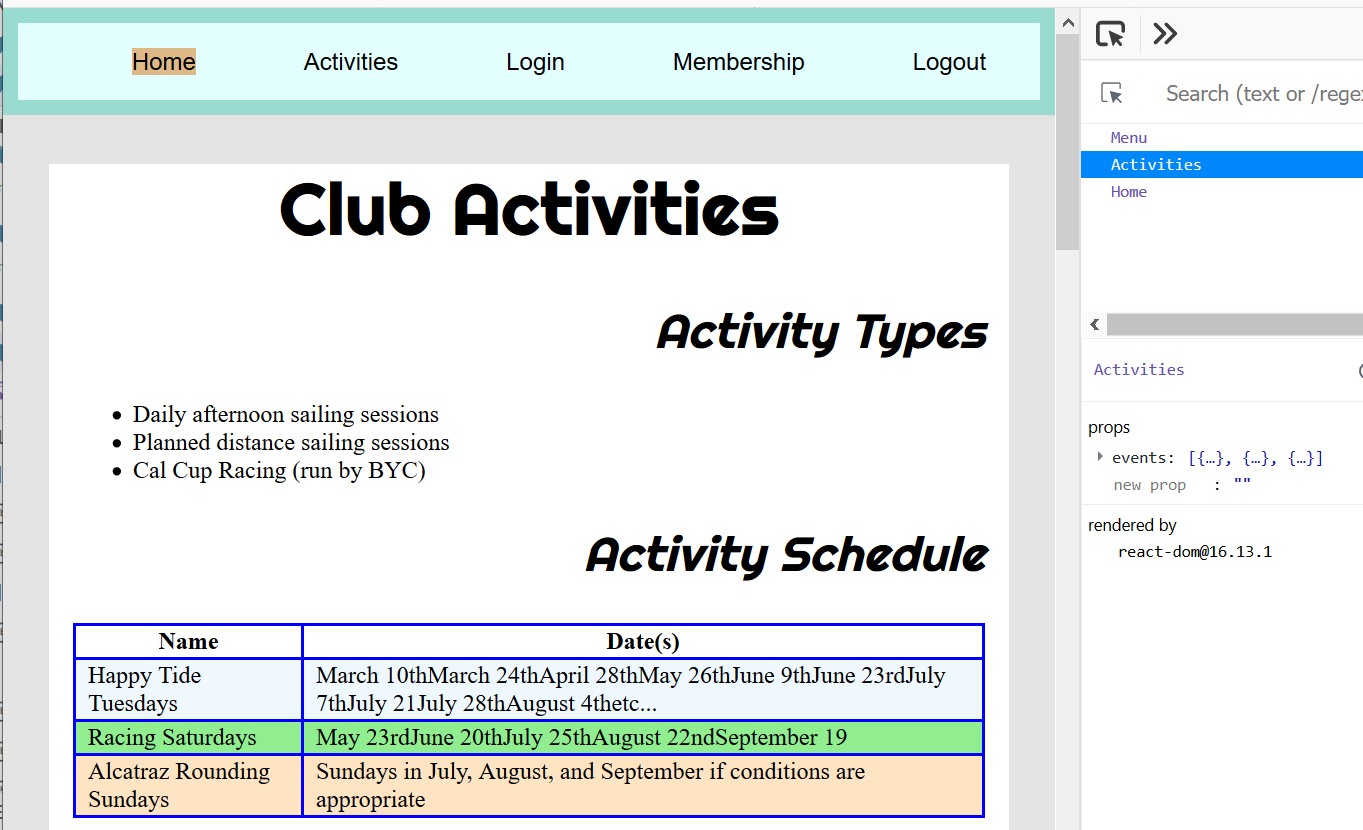
ReactDOM.render(contents, document.getElementById("root"));Show the code for your activities component here. Show a screenshot of your app displaying this component and with the React dev tools component view focusing on this component.
My screenshot looks like:
(b) Login
Create a (non-functioning) login component (no SVG doodle or extra functionality). Note: we will bring this component to “life” in a later homework.
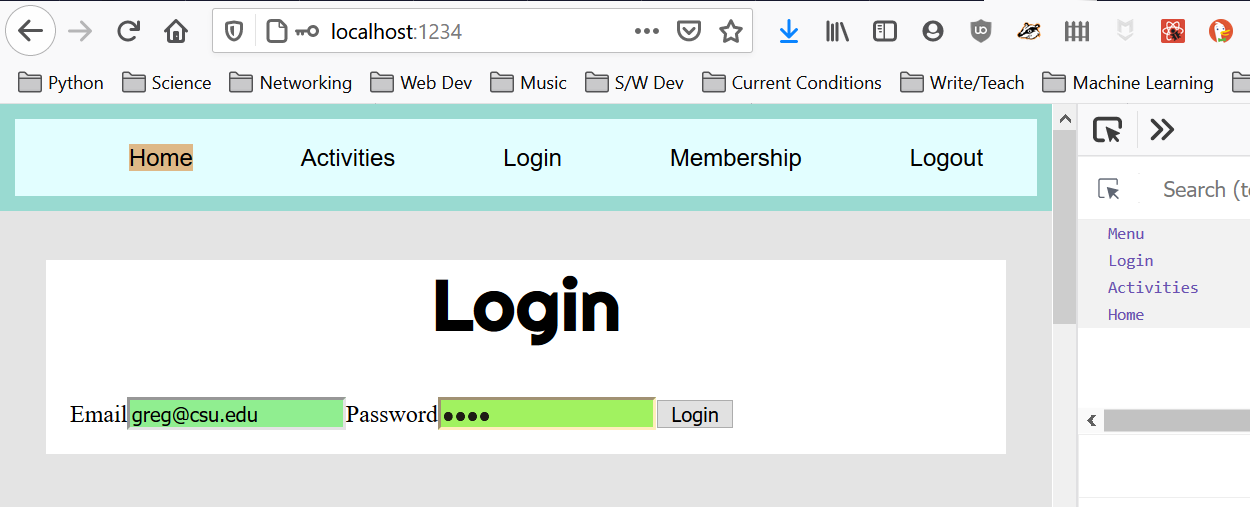
Give the file name for this component. Show a screenshot of this component in use in your app.
My screenshot looks like:
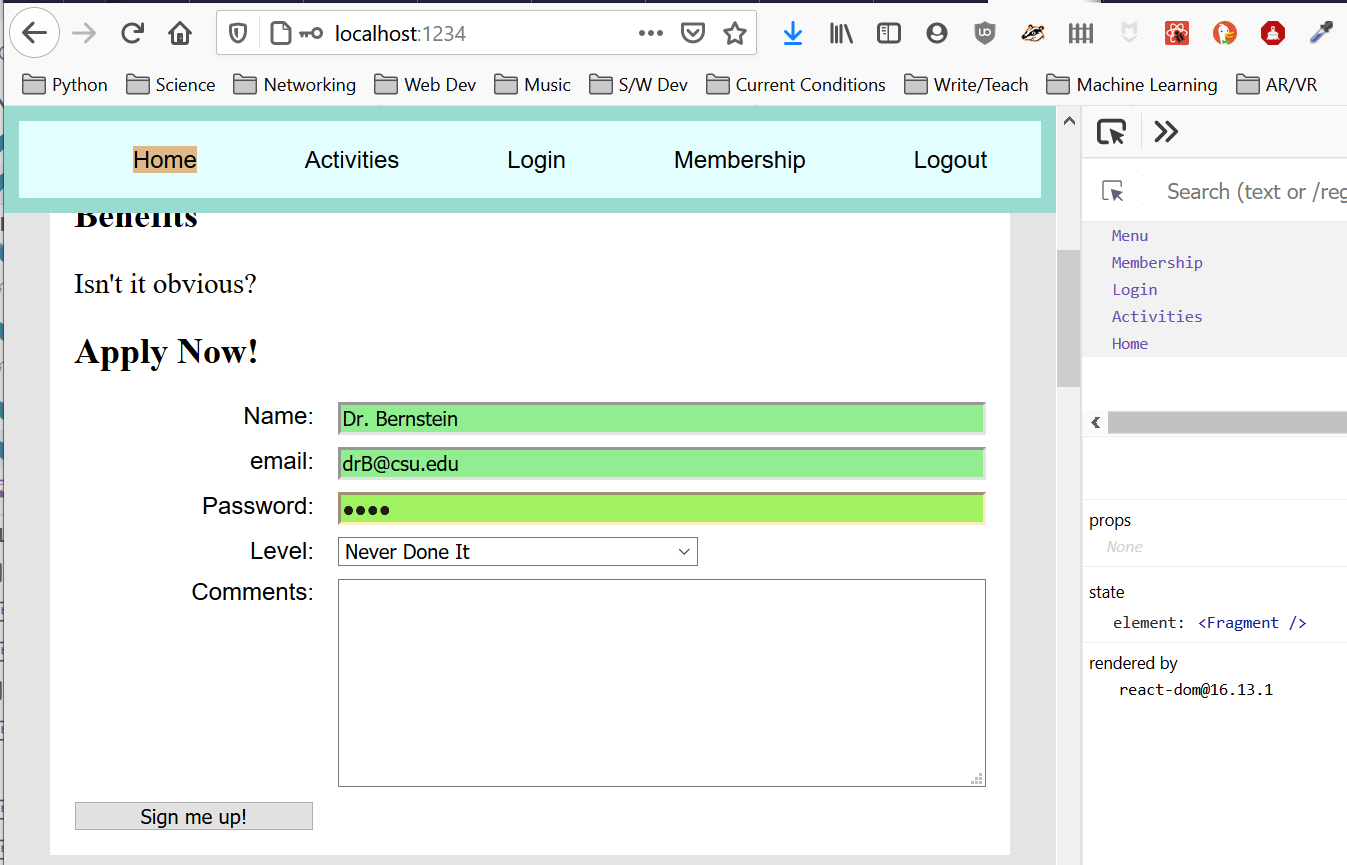
(c) Membership
Create a (non-functioning) membership component. Note: we will bring this component to “life” in a later homework.
Give the file name for this component. Show a screenshot of this component in use in your app.
My screenshot looks like:
Question 3 (10 pts) Application State
(a) App Component
Within you index.js create an App class based component somewhat like the following:
import React from "react";
import ReactDOM from "react-dom";
// lots of component imports
class App extends React.Component {
constructor(props) {
super(props);
// Application state variables:
// *role* is for RBAC == "role based access control"
// we have "guest", "user", and "admin"
//
this.state = { role: "user", show: "home" };
}
render() {
let content = <Home />;
// statements/logic to set the content variable based on state
return (
<>
<Menu/>
{content}
</>
);
}
}
// Now rendering the App component!
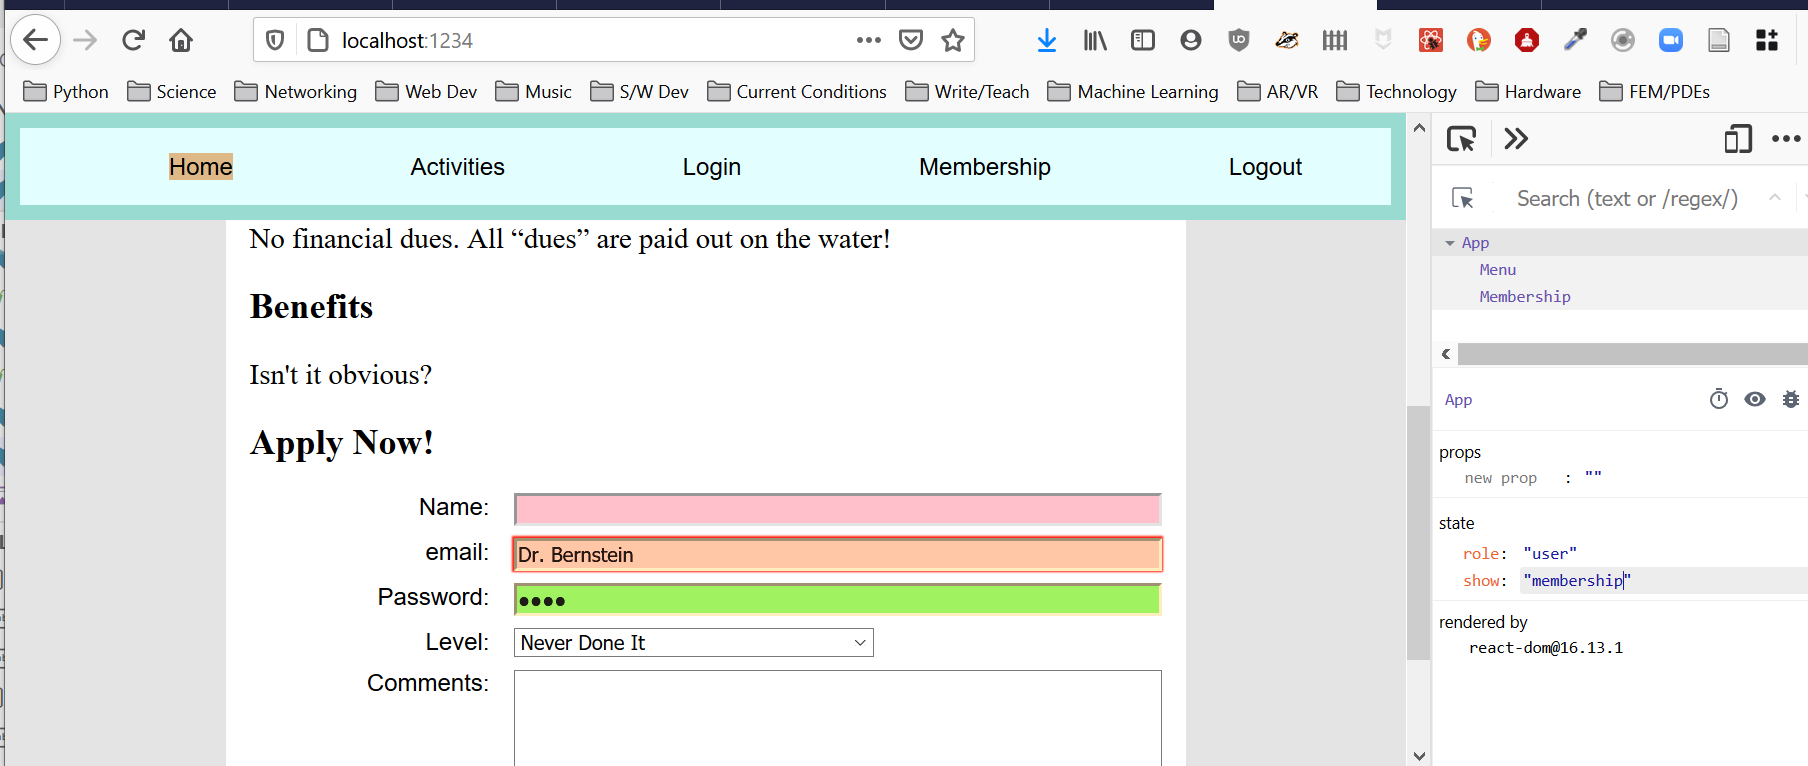
ReactDOM.render(<App />, document.getElementById("root"));(b) Conditional Content Rendering
In your update the App component to show the appropriate component based on the state variable show. Note: you can use other names for the state variables role and show. Debug your application to make sure you can see all your different components just by changing the state variable show in the React developer tools in your browser.
Show a screenshot demonstrating this capability. Note: we have not learned enough about React yet to change the state from our menu component. We will do that in the next assignment. Show your App’s render function (not the whole App file).
My screenshot looks like:
Question 4 (15 pts) Dynamic Menu based on State
(b) Dynamic Menu
Now pass the App state role into your menu component and have your menu component only show the appropriate items based on the role.
Show a screenshot with role = “user”.
Show a screenshot with role = “guest”.
My screenshots look like:

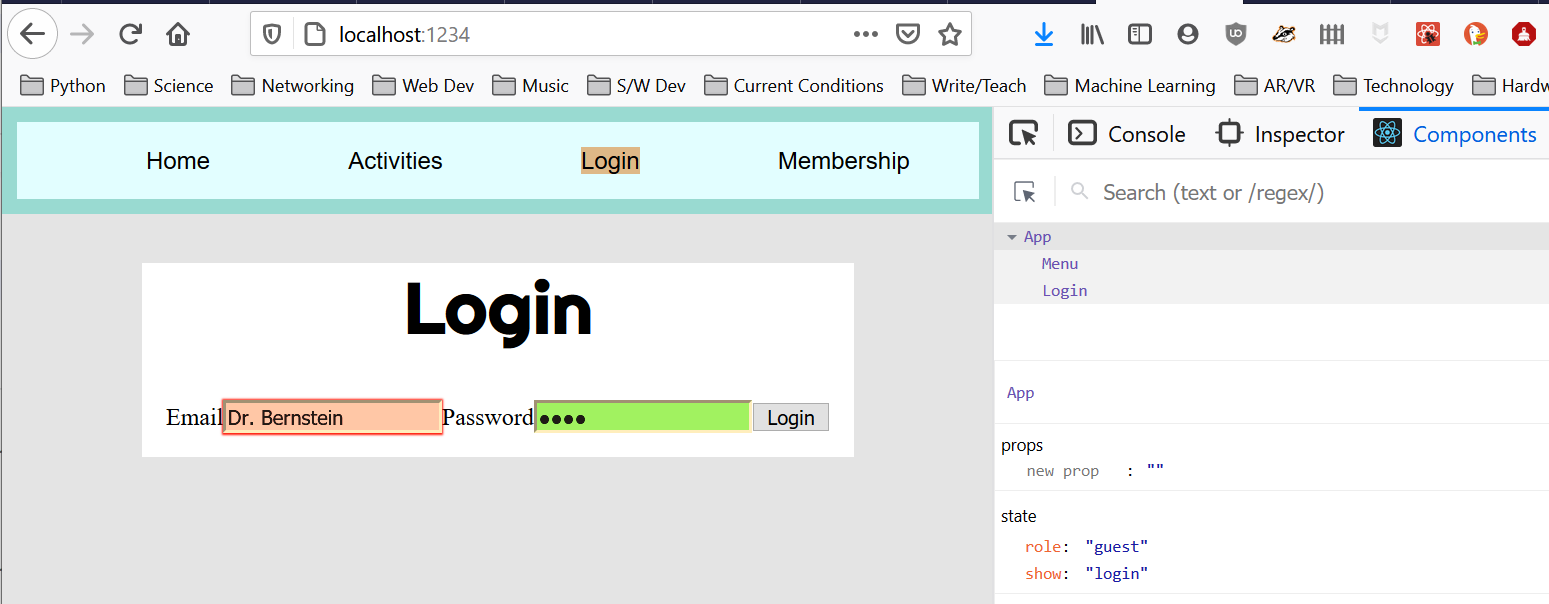
(c) Active Component
To help our visitors know where they are in our App we will add a highlight to the corresponding menu item. To do this pass the App state variable show to the Menu component so it can add the appropriate CSS class to the item.
For example here is a screenshot when a visitor is looking at activities (note Activities menu item highlighted)
Here is a screen shot when a visitor is about to login (Note Login menu item is highlighted)
Test this from the React developer tools extension by changing the App show state variable.
Show the code for your Menu component here.